
Designing For Snow
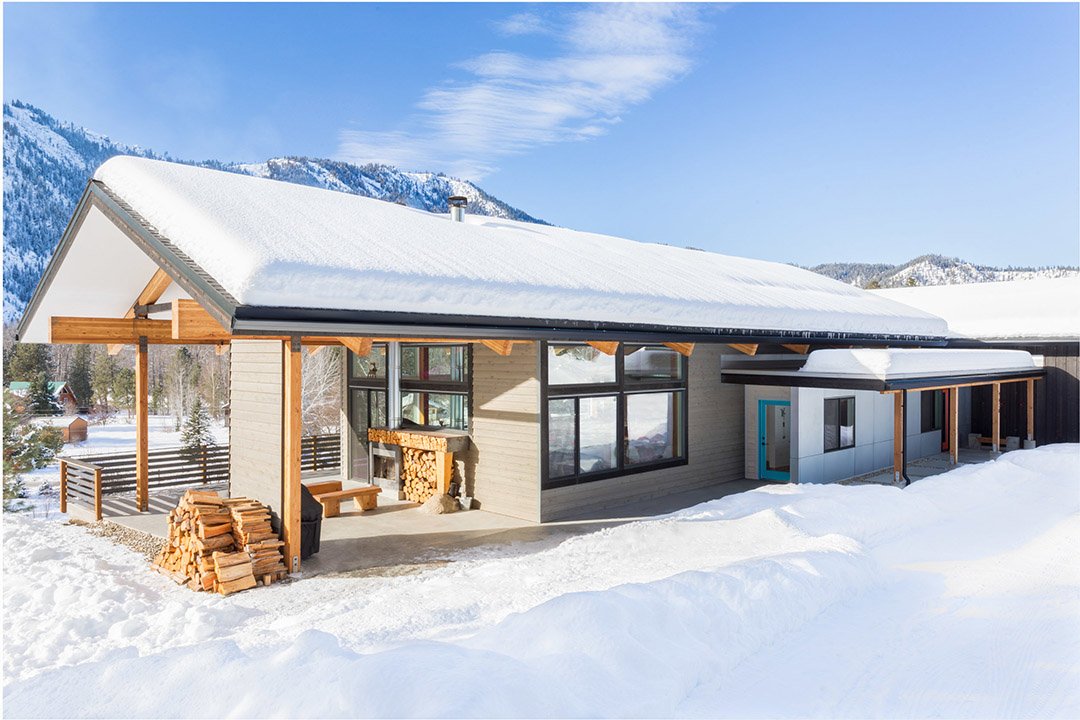
Namu Lodge in snow covered Leavenworth (photo: Roman Rivera)
With winter upon us here in Leavenworth, we prepare for our annual deluge of snowfall. Our little village receives an average snowfall of 89 inches each winter. Walking through our neighborhoods each year is a case study in what works (and what doesn’t work) when it comes to how buildings handle snow. A timeless dance between man and nature unfolds.
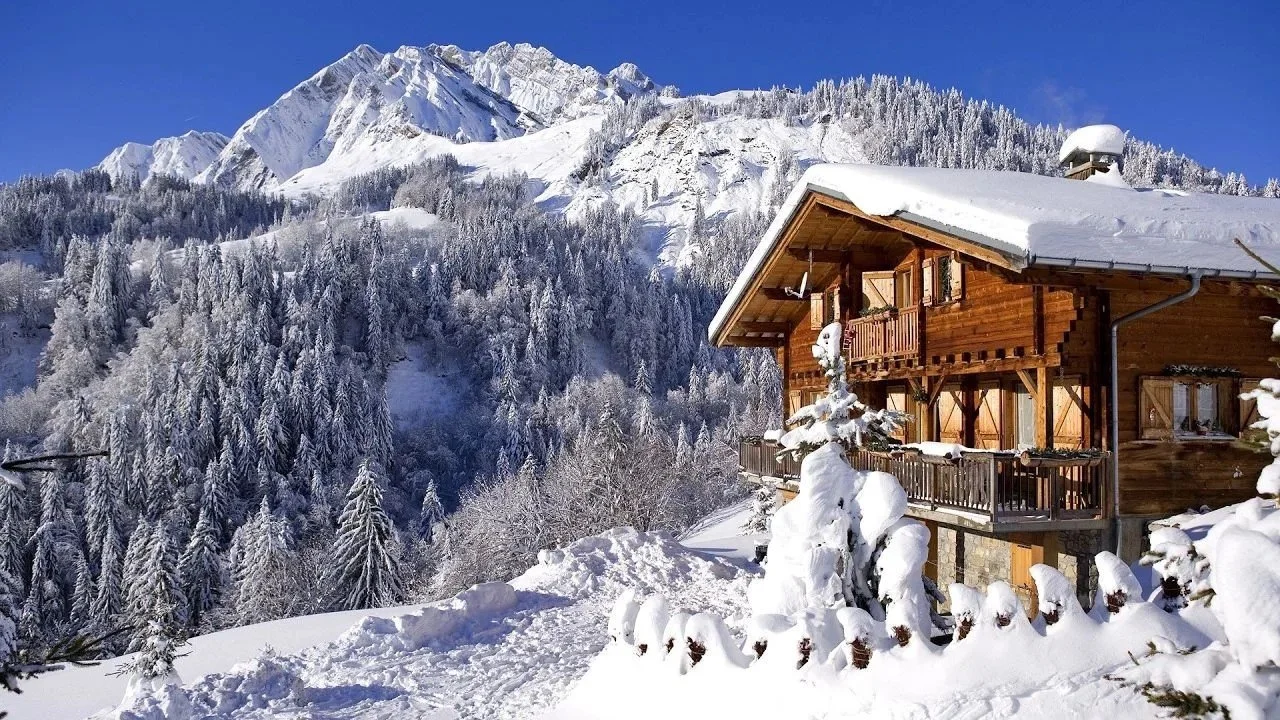
In the Bavarian Alps, which our village is modeled on, snow blankets the landscape for months on end. The quaint villages nestled amidst these majestic peaks have weathered centuries of heavy snowfall, their survival is a testament to ingenuity, adaptation, and respect for the environment. The architecture there provides additional lessons in making a built environment which functions and lasts.
With this historical and visual context in mind, we aim to illustrate how thoughtful planning of your roof design, site layout, and exterior finishes can lead to a better overall living experience through the winter. Often times clients come to us who are not familiar with living in an area with significant snowfall. We enjoy working with people to share our knowledge gained from living in this wonderful winter wonderland. This article illustrates a starting point towards successfully designing for snow.
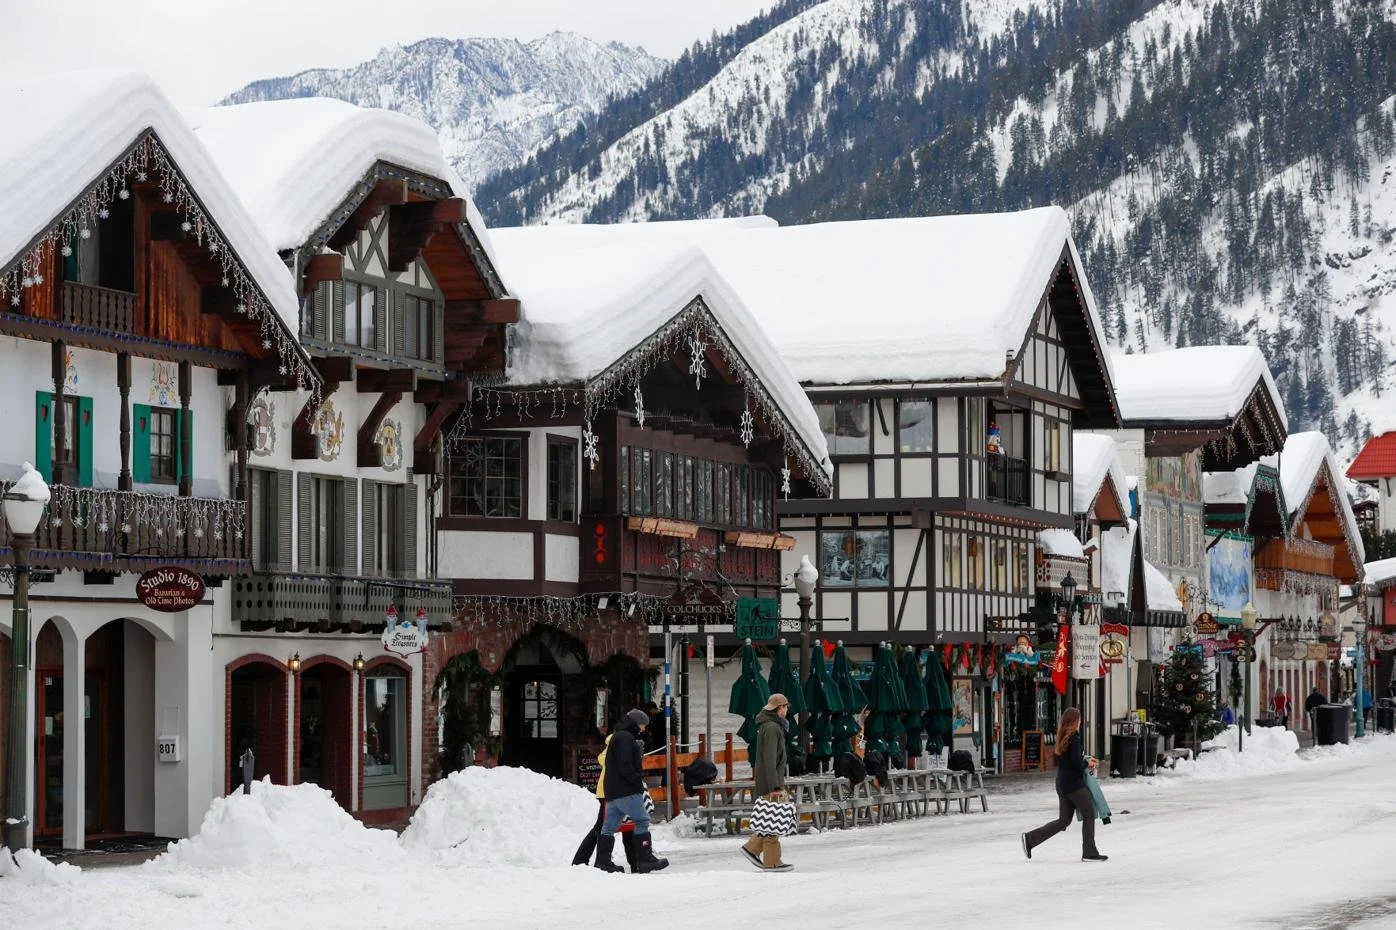
Leavenworth’s Front Street in Winter (photo: Jennifer Buchanan)
Traditional style Bavarian home in Garmisch-Partenkirchen, Germany (photo: unkown)
The Most Common Misconception
When we get into discussions about designing for snowfall, one topic almost always comes up: how to get the snow off the roof. There seems to be an attitude that getting snow off of the roof is always best and that not doing so endangers the building. This is a common misconception. For example, Syracuse New York is considered the snowiest city in the USA with a whopping average of 127.8 inches of snow each year. If you Google Syracuse New York via satellite imagery, or maps, you won’t find many sloped roofs in their downtown. So where is all of that snow going?
Historically, structures were not designed for snow loads and would fail catastrophically from roofs caving in, or suffer from major structural and water damage. However, currently, building codes mandate permitted structures be designed for extreme weather events. In Washington State, GIS mapping establishes snow loads to design for based on location. Within Leavenworth, structures are designed for snow loads of a minimum 85-psf, which equates to over 4ft of wet snow on the roof!
So let’s debunk this myth. Getting snow off the roof is not always best. Snow can even act as an additional layer of insulation on the roof. In fact, walking around Leavenworth you can see plenty of examples where snow shedding off the roof is detrimental, even dangerous. We’ve seen front doors barricaded by snow berms, neighbor’s fences crushed by roof avalanches, and warning signs advising pedestrians to stay away from roof eaves lest they be crushed by falling snow and ice. When designing a roof to shed, it requires thoughtful planning of where the snow will go and this is often overlooked. So what are some ways to be thoughtful about snow on our roofs?

Aerial of Syracuse University and downtown in winter
(photo: Getty Images)
Roof Design
There are several decisions in the design of a roof where we can plan for how snow will be handled.
Roofing material selection. The choice of roofing has a major impact on how likely snow is to stay on the roof. Rougher materials, such as asphalt shingles, provide an abundance of friction which holds snow in place. Whereas smoother materials, such as metal, provide little in the way of friction and encourages snow to slide off the roof.
Roof pitch. The angle of the roof is the other major influencer when it comes to whether or not snow stays on the roof. Steep roof slopes will frequently shed snow regardless of the roofing material. With moderate roof slopes, the material selection will be the determining factor of whether the roof sheds snow. For low sloped roofs, snow will typically stay on the roof.
Snow retention systems. There are options for designing in elements which hold snow on the roof, even for metal roofs with moderate to steep slopes. These are commonly in the form of snow guards or fences, which come in different shapes and forms, from rails to intermittent metal tabs. Snow guards can be used on all eaves, but due to cost we commonly think of placing them in locations which matter most, such as over paths or entrances to a building.
Ice dams & heat tape. The design of roof venting, insulation, and overhangs has an impact on the chance of ice forming at the edge of eaves. This ice is caused by snow on top of the heated space melting and re-freezing once it gets to the edge of a cold eave. Modern insulation has helped significantly with this, as more heat is kept in the structure rather than leaking through the roof, but it does not totally eliminate the possibility. Options for eliminating the possibility include venting below the roof sheathing to keep the roof surface closer to outdoor temperature and/or adding heat tape to overhangs and gutter to melt ice build-up.
Roof Complexity. Transitions in roof planes create potential failure points in the roof, especially roof valleys. The more there are, the more chance of a leak from water build up due to standing snow and ice on the roof. Simple roof forms offer a low risk of roof issues.
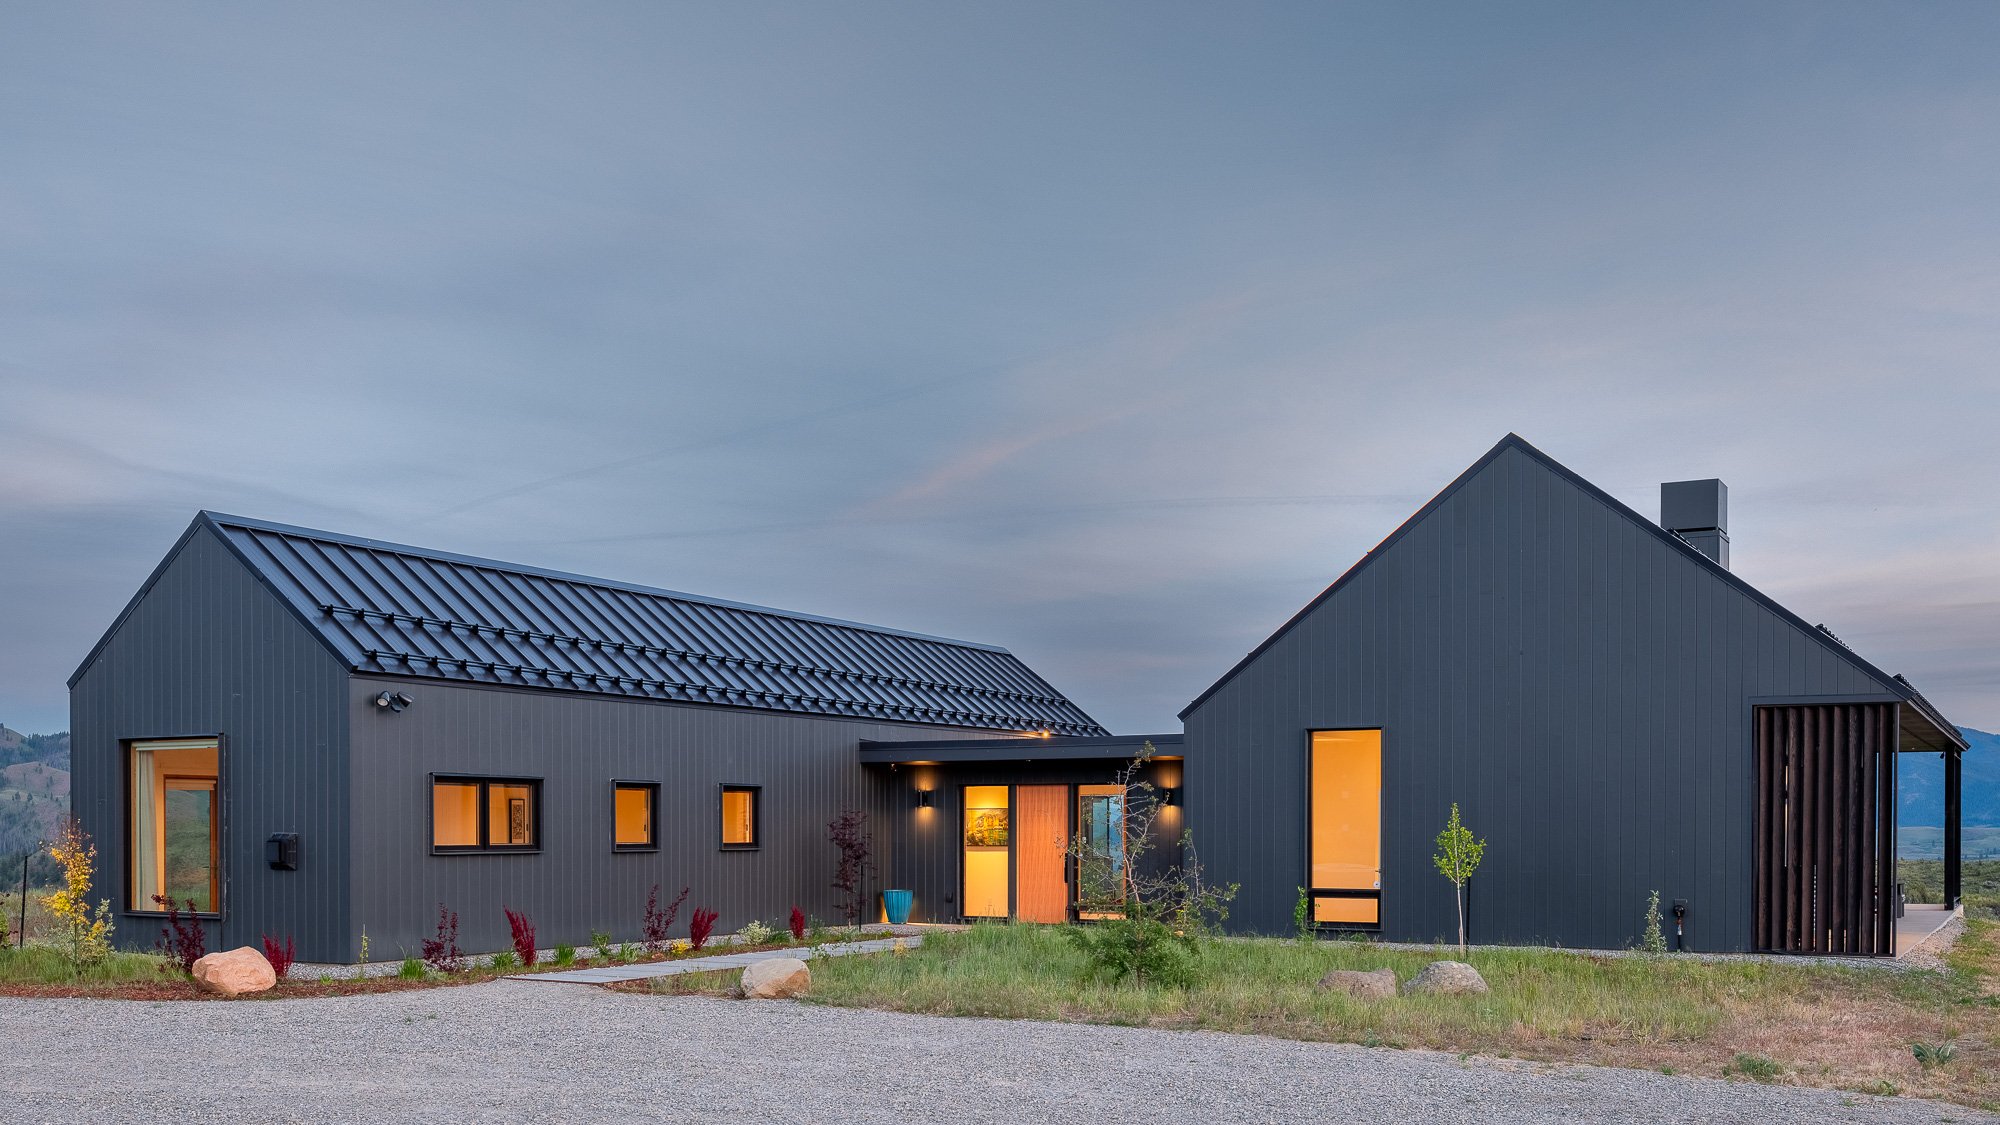
Snow Guards designed to keep snow on the roof at the entry path to our Studhorse Mountain Home project (photo: Jay Thomas Neely)
Site Planning
Beyond the roof, there are several design decisions which can be made at a site layout level which have a big impact on how enjoyable it is to be there through the winter
Proximity of structures onsite. It is fairly simple to conceptualize that if your garage and house are 100ft apart, there is a lot more volume of snow to deal with than if they are 10ft apart. Over the course of a winter, this compounds in time spent shoveling and snow blowing (or in the cost of covered walkways if you go that route). Simply put, closer is generally better in snow country.
Simple and durable access routes. The same concept of proximity applies to driveways and walkways on a property, less is more. A 200ft driveway is much more to deal with than a 50ft driveway. Also, right angles are much easier to shovel and snow blow than winding paths. In addition, paths that you are maintaining through the winter maintain their integrity better if you do not displace them during the act of removing snow, such as you would with gravel or other looser materials.
Covered outdoor living spaces. Using outdoor spaces in the winter generally goes hand-in-hand with snow removal. This is why covered outdoor spaces are extremely valuable in snow country. They offer a space where no matter how big the snow storm was the day before, you can enjoy being outside hassle free. During a time of the year when daylight hours are short and cabin fever is rising, this little boost of dopamine can make a living experience much more enjoyable. Adding patio heaters and outdoor fireplaces can also improve the ambiance and amount of time you want to spend there.
Radiant snow melt systems. There are options for systems which go in under driveways, paths, and patios to melt the snow. These systems are often pricey and need to be maintained, so they should not be a first option. But, for those who are willing to splurge for convenience, they are a great way of reducing the effort to clear snow and making uncovered outdoor spaces more usable throughout the year. Depending on the size of the system, they can run off either electricity or propane.
Snow melt drainage runoff. Whether due to a radiant snow melt system, roof heat tape, or simply the freeze thaw cycles, snow melted will eventually turn into ice. It is important to think about where snow melt runoff will go onsite and avoid ice build-ups in areas where they could cause damage or be dangerous.

Covered outdoor space allowing hassle free use of this deck through the winter at our Nason View Residence project (photo: Tucker English)
Exterior Finishes
Now that we have covered the big topics of roof design and site planning, there are a couple things to consider when it comes to exterior finishes to ensure the longevity in a snowy region.
Durable materials. This is particularly important near the ground where snow is bound to build up. Snow could be sitting up against siding for months and this prolonged exposure to moisture can cause materials to wear more rapidly than they would otherwise.
Avoid porous finishes. Due to freeze/thaw cycles, porous materials are most susceptible to damage. Water will migrate into the material and re-refreeze, expanding as it does so. This continuous melting and freezing causes an effect referred to as ice jacking, and can split a material apart. One example of this phenomenon can often be seen with dry stack stone walls, where water moves into the joints between the stones and ice jacking can pop stones straight off the wall.
Metal and stucco siding providing durable protection from snow at our Ravenwing Ranch, L7 project (photo: Chris Ohta)
Summary
If you are thinking of building in an area which receives a lot of annual snowfall, make sure you are designing well for that location and snow is not an afterthought. There are many decisions through the design process which will directly impact how snow is dealt with onsite, and these can be opportunities to improve the experience of that place in the winter. Embrace snow rather than fight it!
Evan VanSandt, Architect / Project ManagerSyndicate SmithContact